Pitched Roof Solar Mounting Brackets: Practical Checks Before You Fix Rails to Rafters
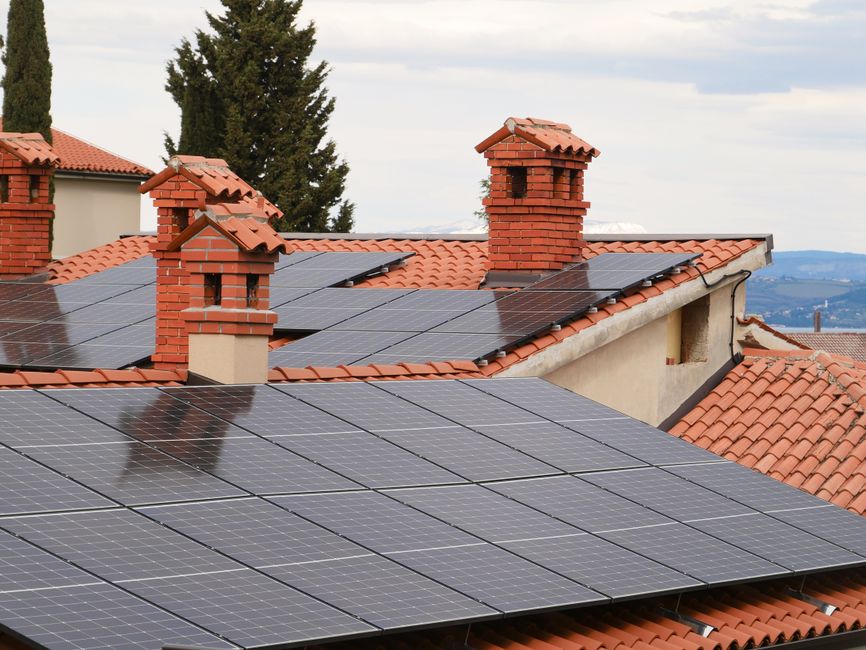
Pitched roof solar mounting brackets are the anchor points that transfer PV module weight and wind loads into a building’s roof structure. For EPC teams and installers, the bracket choice does not begin with a product catalog—it begins with the roof cover type, rafter condition, local design wind speed, and the pain of callbacks from leaks or displaced modules. Get the bracket geometry and material right, and the whole rail and module layout stays reliable. Get it wrong, and the first strong wind exposes mistakes that are expensive to fix once the system is bolted down.
Roof Material Determines Bracket Geometry, Not the Other Way Around
A pitched roof might have concrete tiles, clay tiles, slate, trapezoidal metal sheets, corrugated steel, or asphalt shingles. Each one demands a different bracket foot shape and sealing method. The bracket must sit flush against the roof without creating a water entry path. For tile roofs, that usually means a roof hook that slides under the tile and fastens directly to the rafter. The hook profile—straight, bent, or adjustable—must match the tile’s pan height and profile depth exactly, or the tile will not sit flat after installation.
For metal sheet roofs, L‑feet with EPDM rubber seals and self‑tapping screws often work, but only if the metal gauge and purlin spacing are verified. And for shingle roofs, flashing‑based brackets that integrate with the existing waterproofing membrane are preferred. Skipping this roof‑material‑to‑bracket matching is a common site mistake: an installer might try to force a standard hook onto a roof tile that has a deep S‑profile, causing point loads that crack the tile later.
Rafter Fixing: The Load Path Most Inspections Miss
Wind uplift does not pull modules straight up—it creates a lever force through the rail and bracket into the rafter connection. A pitched roof mounting bracket is only as strong as its fastening into the rafter timber or steel. The screw type, length, and embedment depth matter more than the bracket thickness. For timber rafters, coarse‑thread wood screws with at least 50 mm of penetration into sound wood are typical, but rafter spacing, roof slope, and wind zone will push those requirements up.
On metal purlins, bolts must have proper washers and locking devices. I’ve seen projects where brackets were fixed only to roof sheathing or battens—not into the structural rafter—leading to near‑total failure during a moderate wind storm. A quick field check: after installing the first bracket, give it a firm lateral tug with a wrench. If you can feel movement, the fixing point is suspect.
Engineering Tip: Use Stainless Steel Fasteners Where Corrosion Paths Exist
When aluminium brackets bolt into a steel roof structure or come into contact with treated timber, the fastener material becomes a corrosion fuse. Use SUS304 stainless steel bolts, screws, and washers as a baseline. In coastal or aggressive environments, specify SUS316. The extra cost per fastener is negligible compared to the roof leak repair that follows a rusted‑through screw years later.
Corrosion Resistance: Material Pairing That Keeps the Roof Dry
Aluminium brackets (typically AL6005‑T5) are lightweight and corrosion‑resistant in most atmospheres. Hot‑dip galvanized steel brackets offer higher mechanical strength but risk zinc‑aluminium interaction if crimped directly under a bare aluminium rail without an isolation pad. Many early‑life corrosion claims on pitched roofs actually come from mixed‑metal contact and water trapping, not from the bracket material itself. Always check whether the bracket‑rail interface includes a polyethylene or EPDM separator pad, and whether drainage slots allow water to escape rather than pool under the bracket foot.
For sites within 1 km of the ocean, avoid mill‑finish aluminium brackets unless coated; anodised or PVDF‑coated surfaces add meaningful resistance. In agricultural zones with ammonia vapours, stainless steel brackets or heavy galvanizing may be needed.
| Bracket Type | Best Roof Cover | Fastening Method | Typical Material | Corrosion Resistance | Installation Speed |
|---|---|---|---|---|---|
| Tile roof hook | Concrete/clay tile | Wood screw into rafter | Stainless steel or HDG steel | High (stainless) | Medium (requires tile lifting) |
| L‑foot with seal | Trapezoidal metal sheet | Self‑tapping screws into purlin | Aluminium or HDG steel | Good with isolation | Fast |
| Flashing‑based bracket | Asphalt shingle | Lag bolt into rafter | Aluminium with EPDM | Very good | Slower (waterproofing integration) |
| Adjustable roof hook | Deep‑profile tile or slate | Screw into rafter | Stainless steel | High | Medium |
Rail‑Based or Rail‑Less on a Pitched Roof? Check Module Clamp Zones First
Rail‑less systems for pitched roofs use short brackets that directly clamp module frames to the roof without long aluminium rails. They can speed up installation on simple rectangular layouts, but they leave less tolerance for module positioning and require the rafter grid to match the module width extremely well. For roofs with uneven rafter spacing or complex dormer lines, a rail‑based system gives more forgiving module alignment. Rail‑based also makes later module replacement or maintenance easier without disturbing the roof‑to‑bracket seal.
If you choose rail‑less, confirm the bracket’s clamp grip range matches the module frame thickness (usually 30 mm to 40 mm) and that the manufacturer allows the specific wind uplift load for your design. Modules in high‑wind zones often need additional mid‑clamps or end‑clamps that rail‑less brackets alone do not provide.
Field Failure Patterns That Point Back to the Bracket
When I walk a completed pitched roof array, I look for a few telltale signs that a bracket was not installed correctly: tile cracks radiating from the hook exit point, EPDM seal squeezing out unevenly, module frame edge corrosion near the clamp, and water stains on the attic underside directly under a bracket fixing. These do not usually come from product defects—they come from assembly torque too high (cracking a tile), seal not compressed enough (water ingress), or mixed metals in the fastener stack (galvanic corrosion).
Torque control on bracket‑to‑roof fasteners is often ignored. A power impact driver can easily strip a wood screw or crush a seal. Using a calibrated torque wrench set to the bracket manufacturer’s recommended value (often 8–12 Nm for M8 bolts into aluminium) eliminates guesswork and repeated callbacks.
Pre‑Assembled Components Cut Labour Without Adding Complexity
Brackets that arrive with pre‑assembled nuts, washers, and EPDM seals remove two things: small part loss on the roof and inconsistent seal positioning. For EPCs managing multiple installation crews, this translates into fewer missing parts and a more uniform compression force across all attachment points. Wanhos pre‑assembled roof hooks, for example, insert the EPDM gasket during manufacturing so the seal cannot be forgotten or offset by an installer in a hurry. While the per‑unit cost might be slightly higher than a loose‑component bracket, the labour consistency often pays for the difference within the first 100 brackets installed.
Questions EPC Buyers and Installers Ask Before Ordering
How do I choose the right bracket for a metal pitched roof with hidden fasteners?
Look for a standing‑seam clamp that grips the seam without piercing it. Check the seam profile width and height, and confirm the clamp’s load rating for your design wind pressure. Piercing‑type brackets void roof warranty, so clamp‑style is often mandatory.
What’s the difference between a standard roof hook and an adjustable one?
Standard hooks have a fixed vertical offset; adjustable hooks allow the installer to change the rail height after the hook is bolted to the rafter. Adjustable hooks are useful on uneven rafters or when you need to fine‑tune module tilt and avoid roof obstacles.
Why do some brackets require an isolation pad between aluminium and steel?
Without an isolation layer, moisture can create a galvanic cell where the less noble metal corrodes faster. A simple thermoplastic or rubber pad breaks the electrical path and extends bracket life, especially in humid or coastal zones.
Can I reuse brackets if I remove and re‑install solar panels later?
Possibly, but the roof sealing components (EPDM gasket, butyl tape, flashing) should be replaced. Re‑tightening a bracket after removal risks uneven seal compression. Always inspect the fastener threads for deformation.
What wind load should pitched roof brackets withstand for commercial projects?
Wind uplift is site‑specific and derived from local building codes (Eurocode, AS/NZS 1170, ASCE 7, etc.). The bracket‑rafter connection must be designed for the worst‑case pressure, not the average. Ask your bracket supplier for a static pull‑out test report or calculation note matched to your rafter type and fastener.
Before You Send a Quotation Request
When you’re ready to source pitched roof solar mounting brackets, collecting a few project details makes the difference between a generic quote and a solution that fits. Roof cover material, tile profile (if applicable), rafter spacing and thickness, design wind zone, module dimensions and frame thickness, and any special corrosion requirements (coastal, industrial) are the minimum dataset. With that in hand, a mounting system provider can verify bracket geometry, load capacity, and fastener compatibility without going back and forth for a week.
Wanhos supplies pitched roof mounting brackets designed around real installation workflows: roof hooks, metal roof L‑feet, tile‑roof solutions, and adjustable variants built from AL6005‑T5 aluminium or high‑grade stainless steel, with SUS304 hardware and pre‑assembled sealing components. The product line covers most residential and commercial pitched roof scenarios, and the engineering support team can review your roof plans and suggest the right bracket configuration without pushing a one‑size‑fits‑all kit. If you’re planning a pitched roof PV system and want to avoid the common mistakes described here, reach out with your project details for a technical recommendation and price indication that reflects what your roof actually needs.