What EPC Teams Often Overlook in Solar Module Mounting—and Why It Matters

Key Takeaways
- The capacity of a solar module mounting system is not defined by the rail alone—the full load path from clamp to roof anchor or ground screw determines whether a system will survive a wind event without deformation or water ingress.
- Material selection for mounting components is an environmental decision first and a cost decision second. Choosing the wrong coating or alloy for a coastal or industrial site can turn a 25‑year structure into a 7‑year liability.
- On large commercial rooftops, small assembly logic differences—like whether clamps come pre‑assembled or rails have pre‑punched slots—can shift the installation labor cost by enough to erase the price difference between two mounting bids.
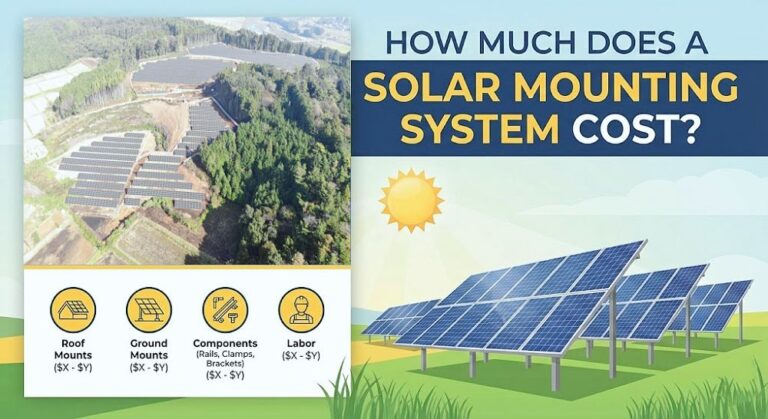
The Real Role of Solar Module Mounting in a Commercial PV Project
It is easy to see solar module mounting as commodity hardware—a set of profiles and clamps that simply hold panels in place. On a commercial project, that view becomes expensive fast. The mounting structure is the system that defines how wind uplift is distributed, how thermal expansion is managed, and whether the 30‑year roof warranty stays intact. When mounting components are chosen without a clear load analysis, the result is not just lost modules during a storm but cracked roof membranes, tripped ground‑fault circuits, and maintenance crews called back to re‑torque loose connections.
In practice, a properly engineered mounting layout for a 500 kW commercial flat‑roof system looks different from one for a sloped metal roof, even if both use the same module size. The rail span, the clamp position relative to the module frame, the type of roof attachment—all these details follow from the wind zone, roof deck material, and building height, not from a standard datasheet. Getting those details right is where project reliability and EPC margin meet.
Material Choice: Aluminum vs. Galvanized Steel—How the Decision Shifts with Scale and Site
For most commercial projects, the two realistic material choices for rails and structural components are structural aluminum (typically AL6005‑T5) and hot‑dip galvanized steel (often S235 or S355 with HDG coating). Neither is universally superior; the choice depends on the corrosion category of the site and the economic weight‑versus‑strength equation.
| Factor | Aluminum (AL6005‑T5) | HDG Steel (S235/S355) |
|---|---|---|
| Weight | ~2.7 g/cm³ – lighter, easier to handle on roofs without cranes | ~7.8 g/cm³ – heavier, adds dead load, but can reduce rail span |
| Corrosion resistance | Excellent in most environments; vulnerable to galvanic corrosion if coupled with copper or uncoated steel fasteners | High when HDG coating ≥ 80 µm; can degrade in highly acidic or marine‑industrial atmospheres if coating is damaged |
| Installation speed | Pre‑punched profiles and lighter weight often reduce on‑site cutting and handling time | Often requires more handling equipment on large roofs; field drilling may damage galvanic protection |
| Project cost | Higher material cost, but labor savings can offset on difficult‑access roofs | Lower material cost per meter; labor and freight costs increase on high‑rise or multi‑roof projects |
| Typical use case | Flat commercial roofs with long spans and low‑ballast requirements, coastal sites with salt spray | Ground‑mount structures in inland areas, carports, or sites where spans can be shorter and material cost is the primary driver |
The table above is a starting point, not a final rule. For a coastal project 300 meters from the sea in a C4 corrosion category, aluminum rails with SUS304 stainless steel fasteners will likely outlast even well‑coated steel, but the design must also account for the lower modulus of elasticity—aluminum deflects farther under the same load, which means rail span tables need to be recalculated. For inland desert ground‑mounts, HDG steel often wins on cost while corrosion risk is low, as long as the foundation interface doesn’t create a crevice where moisture sits.
Engineering Tip: Fastener Selection in Mixed‑Metal Assemblies
When aluminum rails meet steel roof attachments or stainless‑steel bolts, the galvanic couple can corrode the less noble metal. To control this, use stainless‑steel fasteners with an isolating washer or sleeve at every aluminum‑to‑steel contact point. In C3 and above environments, consider a polymer‑lined flat washer between the clamp and the module frame as well—this also reduces stress concentration on the anodized aluminum frame of the PV module.
Rail‑Based vs. Rail‑Less Mounting: Which Logic Cuts Labor Time on Commercial Roofs
The difference between rail‑based and rail‑less systems is not just parts count. Rail‑less mounting attaches modules directly to roof anchors using short profiles or integrated clamps, which removes the long continuous rail. On a large flat roof, that can mean fewer components to lift and align, and potentially a quicker layout. But it also means every roof anchor must be positioned with higher precision, because the module frame now carries the bending load that a rail would have absorbed.
For commercial EPC teams, the practical trade‑off is this: rail‑based systems are more forgiving of minor roof‑anchor misalignment and allow modules to be adjusted after placement. Rail‑less systems demand strict row alignment early in the installation sequence, and if a roof anchor is off by 20 mm, the module clamp may not engage correctly. On high‑bay warehouses with metal deck roofs, rail‑based mounting often proves faster overall because the rail straightens out small deviations in the roof structure. On concrete flat roofs with good surface regularity, a well‑designed rail‑less system can reduce material handling time and ballast block count, but the savings vanish if the crew spends extra hours correcting anchor positions.
Roof Type Dictates the Mounting Approach—Not the Other Way Around
Commercial roofs are rarely uniform. A standing‑seam metal roof, a concrete deck, a trapezoidal sheet, and a built‑up bitumen roof all present different attachment challenges. For metal roofs, the mounting system must transfer loads into the ribs without deforming the seam or creating a water path. Clamp‑based attachments that grip the seam profile without penetration are common, but their pull‑out strength varies with the seam geometry and material thickness—a seam designed for 1.5 kN uplift in one factory may only allow 0.8 kN in another building with thinner gauge metal.
On concrete flat roofs, the weight of the mounting structure plus ballast becomes the first constraint. The structural engineer needs the mounting supplier’s ballast table, which shows how much concrete block mass is required at each support to resist wind uplift for the specific building height and exposure category. A 10‑degree tilt east‑west system can halve the ballast requirement compared with a south‑facing 15‑degree tilt because the wind pressure coefficients drop. That single design choice—tilt and orientation—can mean the difference between a roof that needs structural reinforcement and one that doesn’t.
Ground Mounts for Commercial Sites: Foundation Decisions That Ripple into the Mounting Bill of Materials
When the project moves to a ground‑mount, the solar module mounting system extends below grade. The choice between driven piles, ground screws, or concrete foundations affects rail alignment tolerance, corrosion protection, and installation speed. Helical screws can be installed quickly in soft soil and allow direct attachment of vertical posts, but in rocky or high‑gravel strata, they stall or require pre‑drilling. Concrete ballast foundations, common on landfill or brownfield sites where penetration is prohibited, add weight and require precise formwork to match the post base plate pattern.
From the mounting perspective, the important link is the post‑to‑rail connection. If the foundation crew leaves posts with a height variation of more than 15 mm, the rail must absorb the difference through slotted connections or field‑cut shims—both of which eat into the assembly speed that the racking manufacturer advertises. Pre‑cast concrete curbs with cast‑in channel nuts can solve this when the ground‑mount geometry is simple, but on sloped terrain, adjustable post‑to‑beam brackets become essential, and the mounting system must allow for angular misalignment without losing clamping force.
What Gets Missed in Many Procurement Specifications
Purchasing decisions for commercial solar module mounting often focus on the obvious numbers: rail weight per meter, clamp price per unit, coating thickness. Three less visible items routinely cause delays and call‑backs:
- Clamp‑module compatibility. Not all 35 mm or 40 mm frame clamps fit every module brand equally. The clamp must grip the module frame zone where the laminate allows, typically 40–80 mm from the corner, and the clamp depth must match the frame height without over‑tightening that crushes the laminate edge. If the procurement spec simply says “end clamp for 35 mm frame,” the installer may discover on site that the clamp contact area is too small for the module’s mounting zone defined in the manufacturer’s installation manual.
- Fastener grade and torque specifications. A stainless‑steel A2‑70 bolt behaves differently from an A4‑80 bolt under repeated thermal cycling. If the mounting manual doesn’t specify a torque range (commonly 15–20 Nm for M8 bolts in aluminum rails), installers either under‑tighten, risking loosening, or over‑tighten, stripping threads. This one detail can change the failure mode of a connection from ductile to sudden brittle fracture in a wind gust.
- Pre‑assembly level. Some mounting manufacturers ship fully disassembled components to reduce packaging volume; others supply clamps pre‑inserted into rails or pre‑assembled with grounding pins and washers. The labor cost difference on a 1 MW roof can reach 80–120 man‑hours, depending on crew experience. If the procurement team compares only price per watt of mounting material, this labor cost stays invisible until the installation contractor sends the variation order.
FAQ: Common Questions from Commercial Project Teams
What is the expected service life of a commercial solar module mounting system?
With proper material selection and corrosion protection, aluminum mounting structures in C1‑C3 environments can readily serve 25–30 years—matching the module warranty. In C4 coastal or C5 industrial atmospheres, a system using AL6005‑T5 with SUS316 stainless fasteners and regular inspection can still reach 25 years, but accelerated coating breakdown on steel components is likely within 12–18 years if maintenance is not performed.
How does wind uplift affect mounting design differently on a high‑bay warehouse versus a low‑rise office building?
Wind pressure increases with height, exposure, and roof edge zones. A 12‑meter‑high warehouse in an open terrain category may see edge‑zone uplift pressures 1.8–2.5 times higher than a 5‑meter office in a sheltered urban area. The mounting system must be engineered not just for the average array load, but for the higher‑pressure corner and perimeter zones. This often means closer rail spans, additional roof attachments, or higher‑mass ballast blocks in those edge areas—something a uniform‑layout procurement spec can miss.
Which solar mounting approach is better for large flat roofs: rail‑based or rail‑less?
There is no universal “better.” If the roof surface is uneven or the anchor layout has some tolerance, rail‑based systems are more forgiving and often faster to level. If the roof is flat and the mounting points can be accurately set out, a rail‑less east‑west system reduces material weight and ballast. The best choice is the one that matches the roof’s regularity and the installation crew’s equipment—laser‑guided layout teams can make rail‑less work efficiently, while crews accustomed to traditional rail systems may lose time in the transition.
What fastener materials are suitable for a commercial site 500 meters from the ocean?
At that distance in a high‑humidity coastal environment, corrosion category C4 is likely. Use stainless‑steel fasteners of grade A4 (also known as 316) rather than A2 (304). For bolts in contact with aluminum, include a polymer or nylon isolating washer to prevent pitting corrosion on the aluminum around the bolt hole. Avoid zinc‑plated carbon steel fasteners entirely—they can show red rust within 3–5 years in such conditions.
How can I reduce installation time for a 2 MW ground‑mount project?
Start with the foundation‑to‑post connection. Pre‑assembled post‑to‑beam brackets that allow height adjustment without shims can save 30–45 seconds per post. Next, specify pre‑punched rails with snap‑in grounding clips so that module clamps do not require separate grounding jumpers. Finally, lay out rows so that modules can be placed from a single side without reaching across—this small site‑planning detail often trims more time than any component change.
Before You Send a Quotation Request
Solar module mounting for commercial projects is not a catalogue part; it is the structural interface that connects the PV array to the building or ground for decades. Before finalizing project specifications, confirm the site’s corrosion category, the exact module frame dimensions and clamp zone, and the wind uplift design values for the roof edge zones. Share those with your mounting supplier, not just a module count and roof type.
When the project demands a mounting system that balances installation speed, long‑term corrosion resistance, and compatibility with local building codes, the Wanhos engineering team can help. We don’t just quote a racking kit—we review the load path, recommend material and fastener combinations appropriate for the site environment, and suggest assembly details that reduce labor time on large commercial arrays. Reach out with your project drawings, module data, and wind load parameters, and we’ll work through the mounting design together.